Optics:
First decide what focal length you wish to use. If your aim is to include the surrounding terrain and carry a minimum of gear, then a DSLR or Mirrorless camera with a high quality lens is the only way to go.
While I'm a Zeiss and Canon L-Series lens fan, the new Sigma "Art" series lenses are worth a look.
Razor sharp, great colour correction and won't break the bank.
Above: Test shot showing the Southern Cross . 30 seconds, tracked with Losmandy Starlapse
3/4 Moon, Urban skies, thin cloud.
Canon 5DIV with a Sigma ART 50mm F1.4 Lens @ F3.2
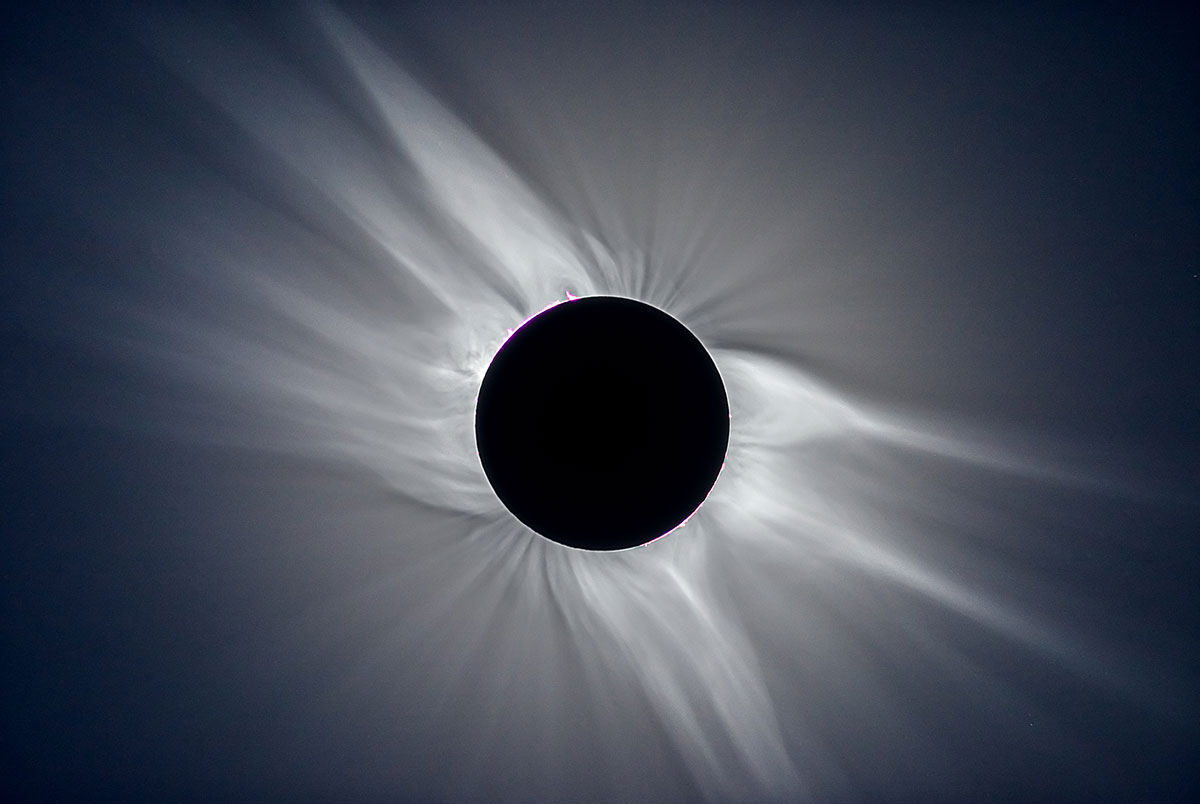
If you want to reveal fine structure of the inner corona , solar limb and any prominences, then a quality APO refractor, rather than a serious focal length telephoto lens, is your best choice: it will have far less ghosting/stray reflections during the diamond ring phase and likely have better colour correction than any camera lens. I have tested some very expensive 500mm Canon L-Series glass against quality astronomical refractors, and the results have been chalk and cheese. But don't take my word for it. Test some gear for yourself.
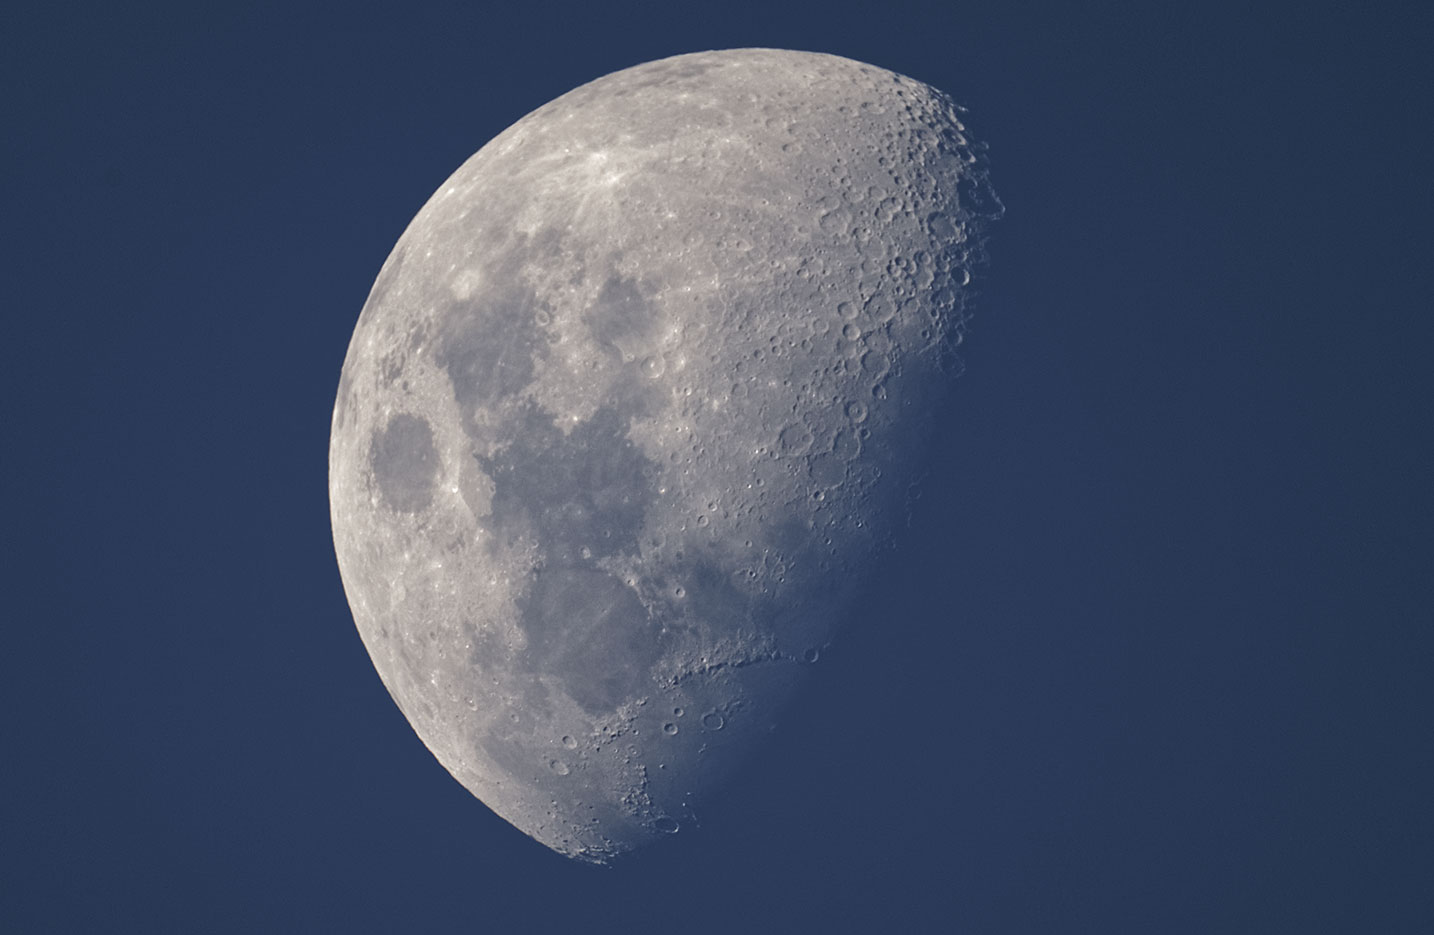
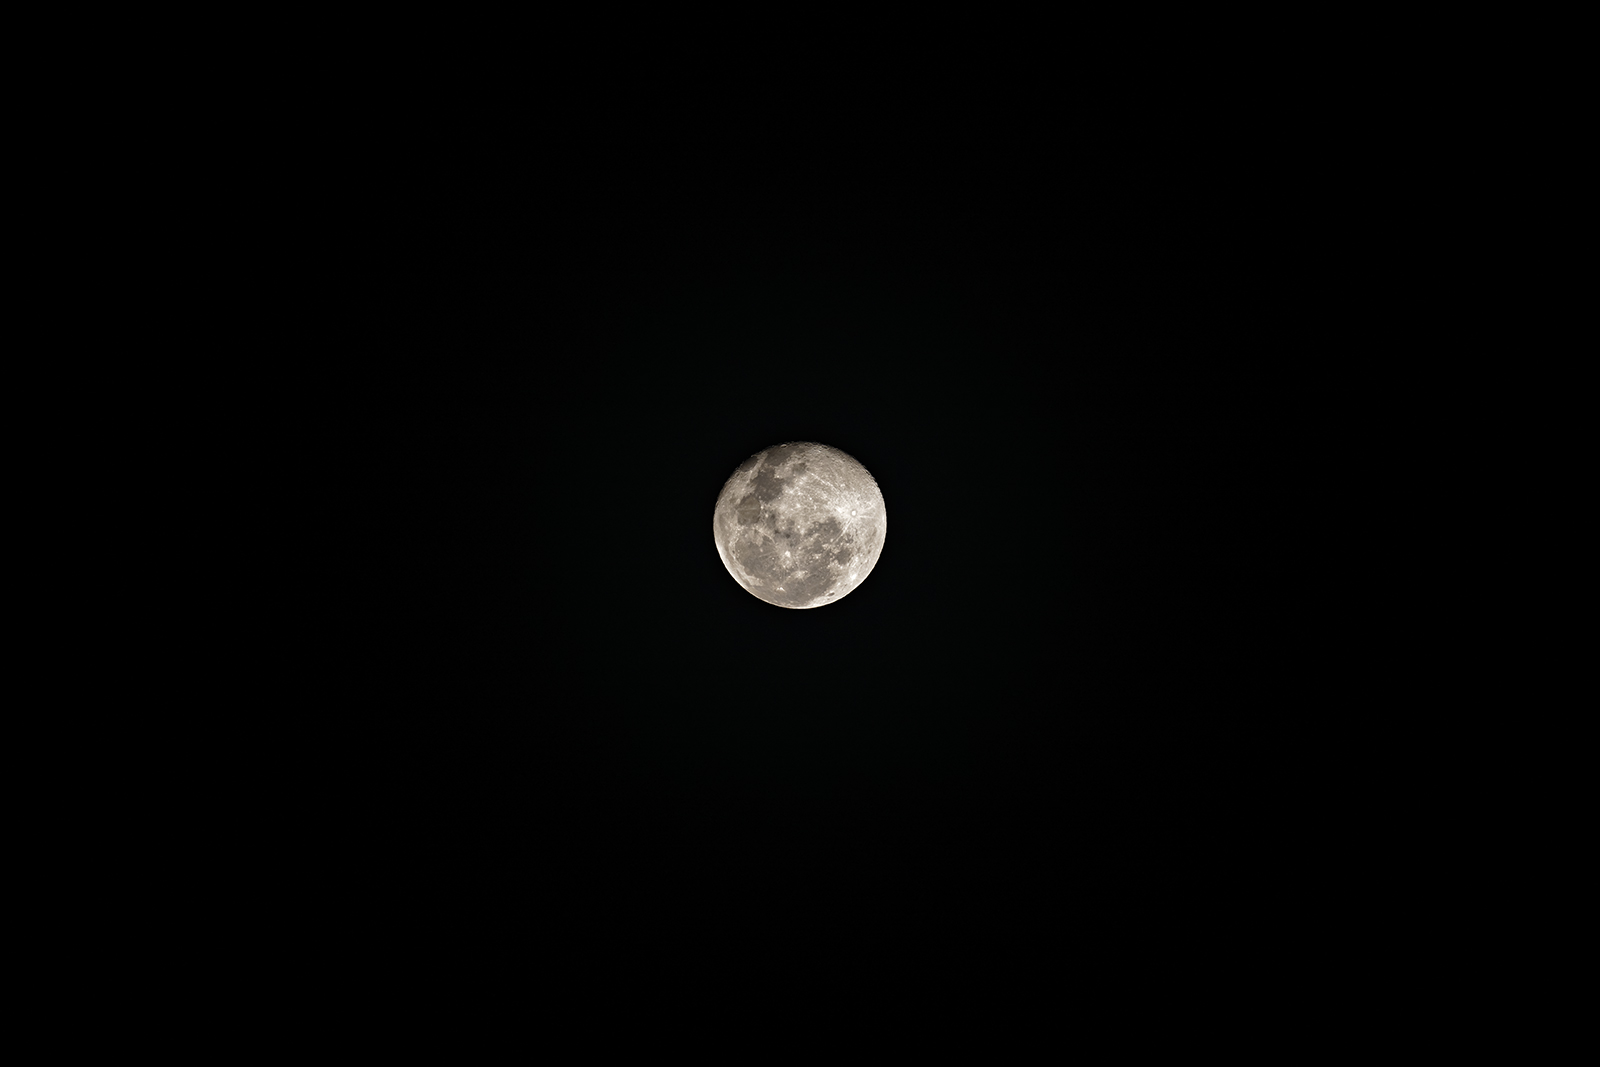
Above: FSQ85 Test photo of the moon at dusk. Given the Moon and Sun have the same angular size on eclipse day, practice shots using the moon are great for deciding on image scale, framing etc.
Try taking some night time test exposures of mercury-vapour street lights, or better still, outdoor playing field lights from a few kilometres away. Aspects that can ruin eclipse images are lens flares and less than perfect colour correction (often seen as a blue/purple fringe or halo around the lights). It's really up to you to decide how much of this is unacceptable.

Above: Canon 70-300 L series zoom. A good result, but shows extended diameter flare around the playing field lights and some purple lens flares.
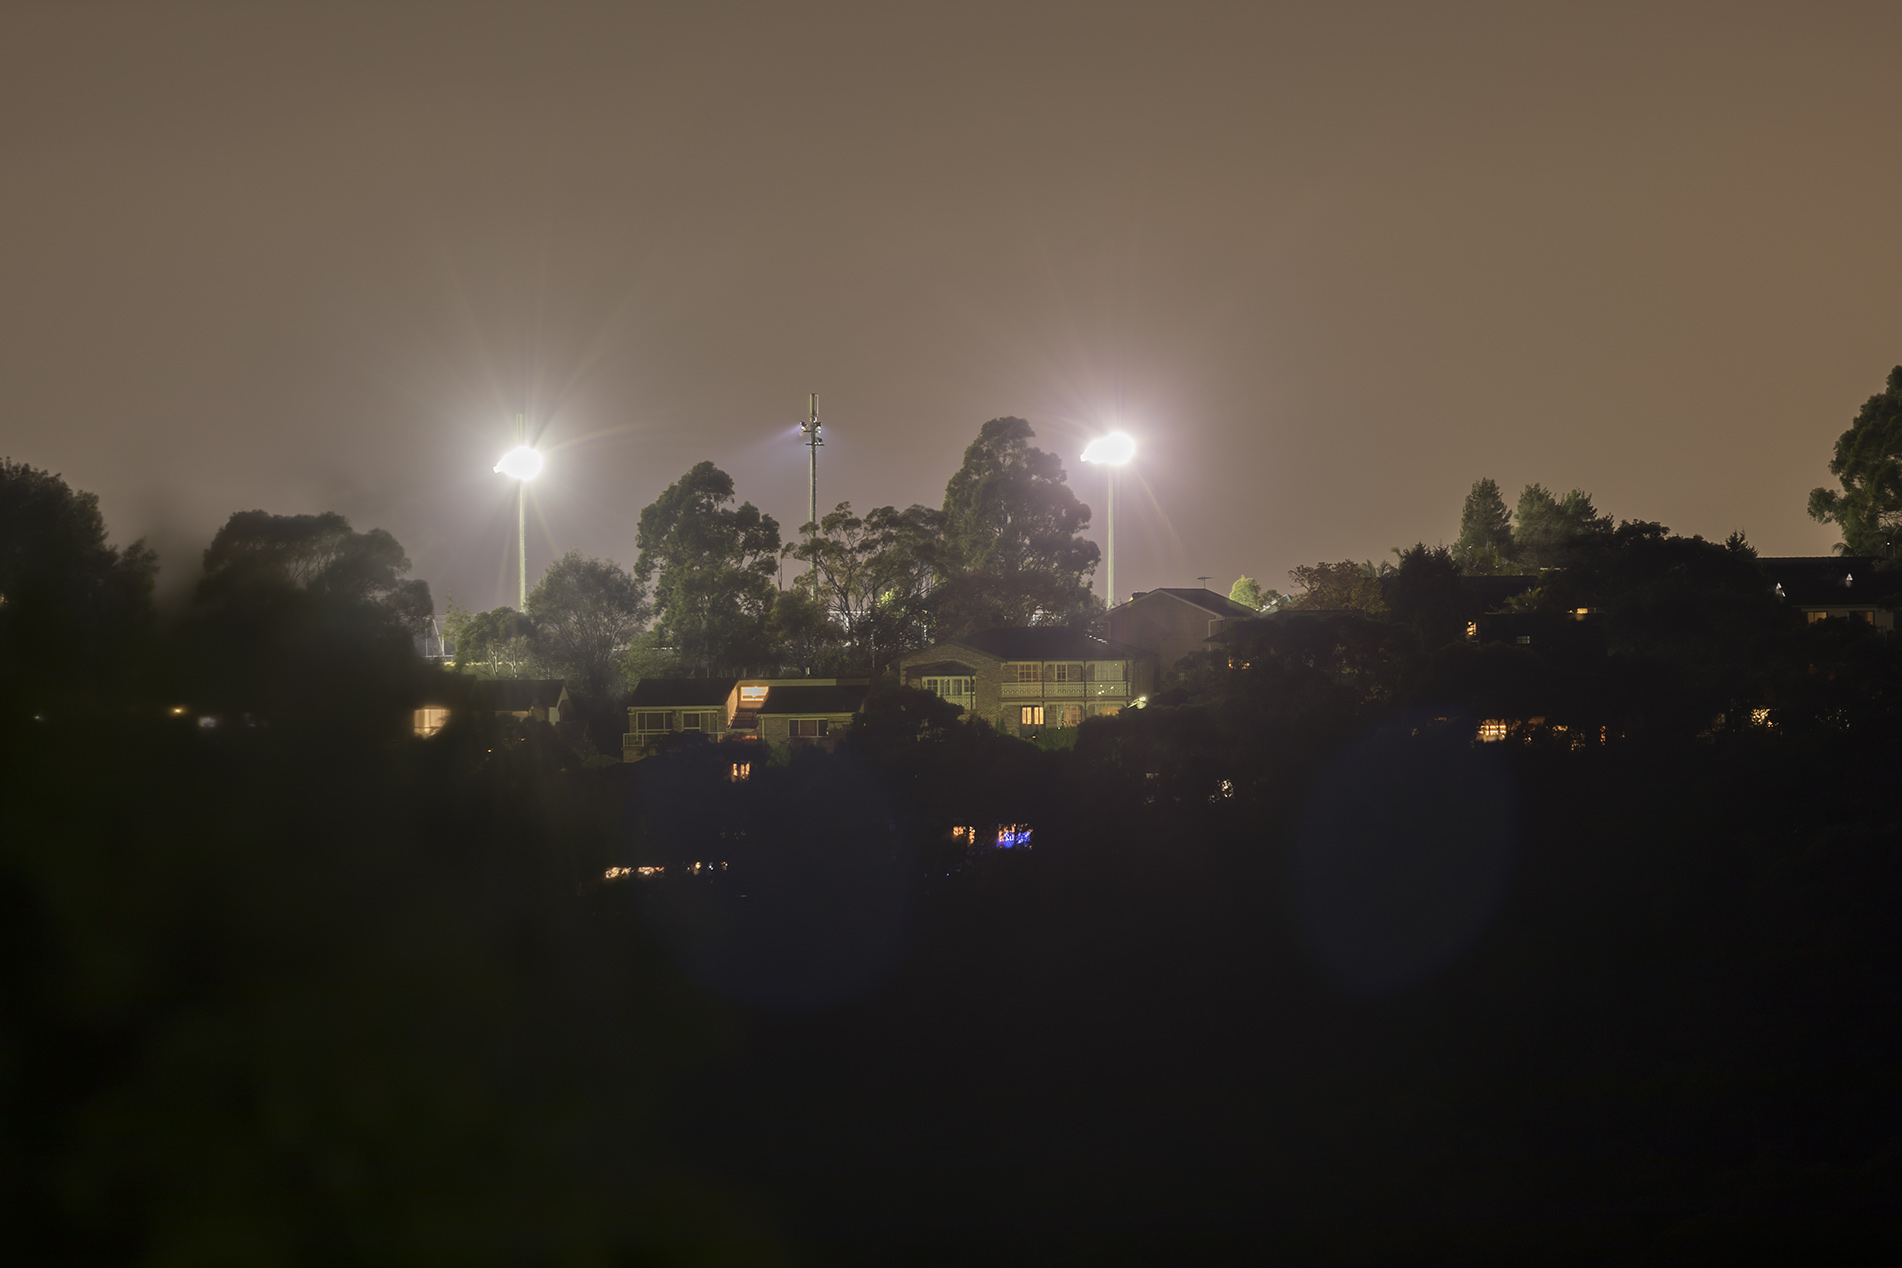
Above: About as good as it gets, despite the glaring Mercury Vapour lights lighting up a distant paying field
the Takahashi FSQ85 for this image shows very faint, neutral coloured ghosting and zero purple fringes, smaller diameter flares
(note the space between the trees and flare from the lights) and no false colour.
As to whether you can shoot both wide and narrow field eclipse images at the same time...I have seen many try and fail. But hey, if you can pat your head, rub your tummy, hop on one leg, chew gum and blink one eye all at the same time, then go for it. That said, a second unattended camera happily clicking away in intervalometer mode would not be too much of a stretch.
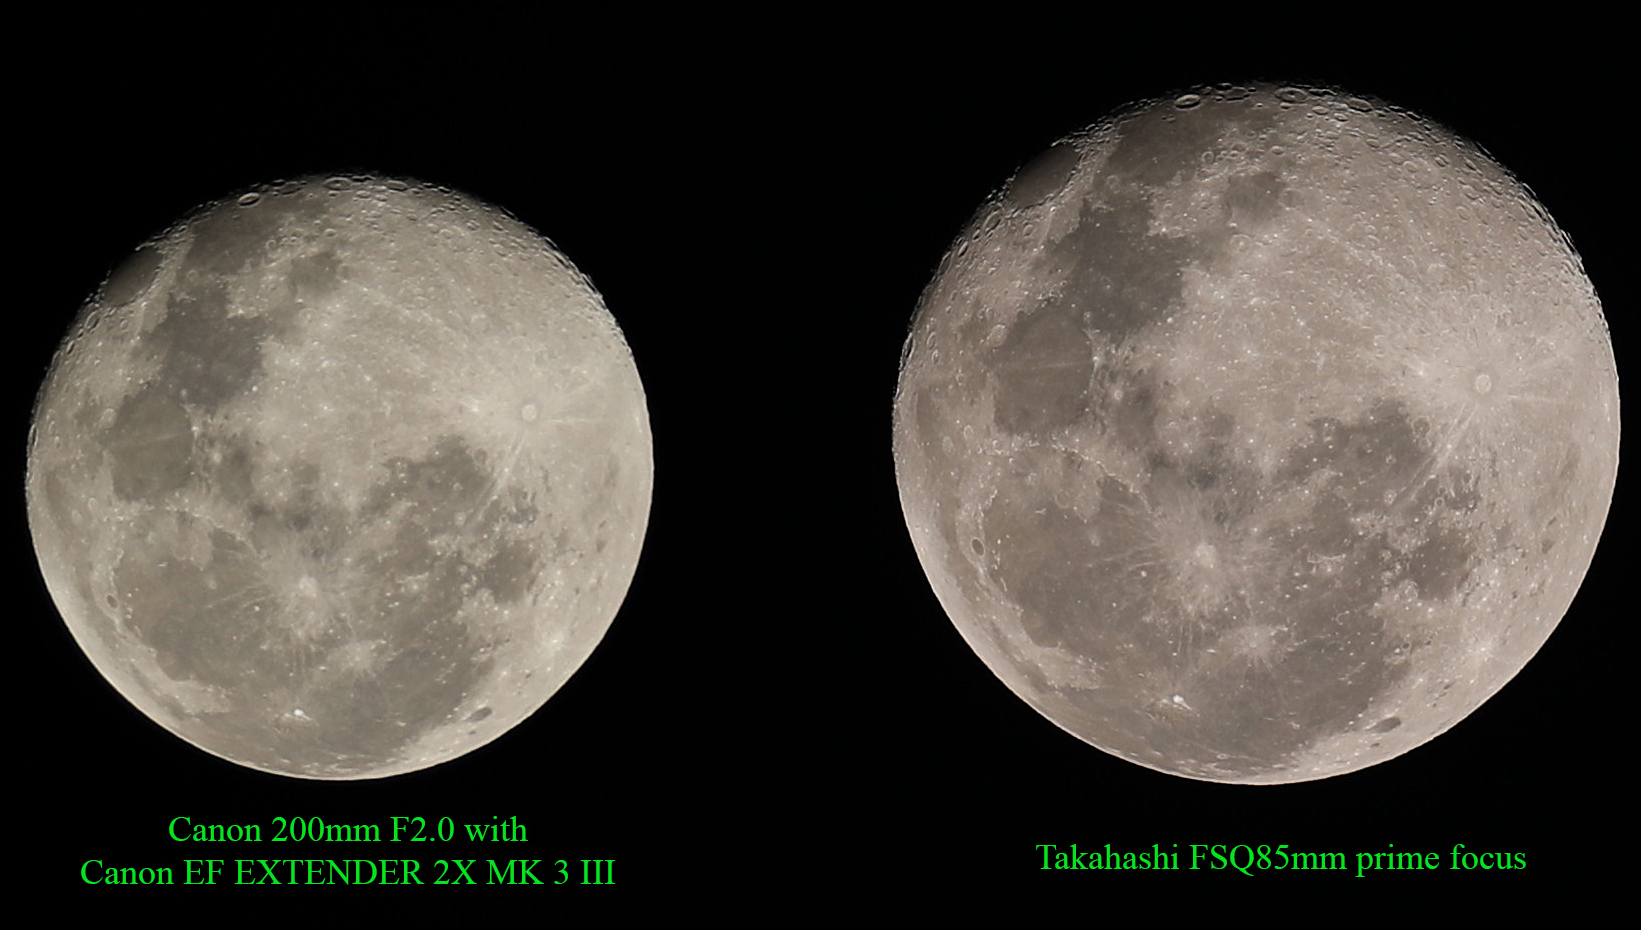
Above: One of Canon's sharpest lenses (albeit with a 2x converter) vs the Takahashi FSQ85, 100% image size, cropped. Minimal RAW processing with DxO11
The Takahashi is noticably sharper with decidedly larger image scale, odd given the focal length's are very similar....400mm (F4.0 Canon with 2x) and 450mm (F5.3 Takahashi)
Both lenses show excellent colour correction.
Above: The Moon with Canon 5D MKIV with Baader ESO to 2" adapter and Takahashi FSQ85mm (Modified Petzval quadruplet apochromat) at prime focus
Mountings:
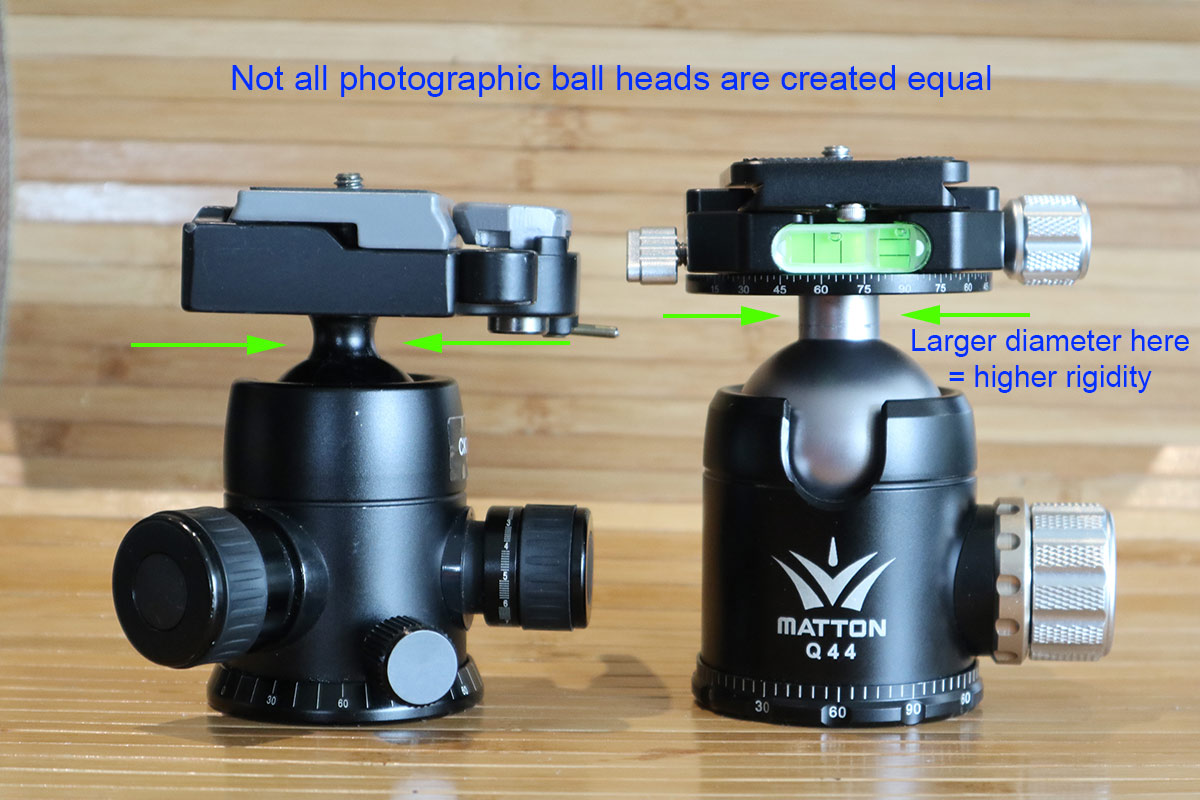
The best optics in the world will count for noting if you place them on an unstable tripod...particularly if you want to capture the outer corona with several seconds worth of time exposures. While new carbon fibre tripods will provide remarkable stiffness for weight, don't be tempted to use something too light. Basic engineering principles such as large tube/leg diameters still apply. This also applies to the ball head you might want to also use for easier framing. Many heads have small diameter coupling shafts, and given a any mechanical system is only as strong as its weakest link, best not to skimp here.
If you are testing a new tripod in a camera store, lean on it, bend and flex the head. Try to break the bastard! (well ...almost) The less movement the better. While you might like the price tag, a less than rigid tripod will remind you it was a bad choice every time it fails to deliver.
An equatorial head will also make life on the day much easier, particularly with longer focal lengths. Unfortunately many "camera tackers" are not built to take a small telescope with a full frame DSLR. For lenses upt to about 200mm, then a camera tracker on a standard photo tripod will however work a treat. Word has it the Vixen Polarie tracks extremely well...but unless Vixen want to send me one to test....sorry I can't say for sure.
If you are checking in gear with an airline, then weight will be a consideration as most US carriers charge for checked baggage these days.Two standout products for the Eclipse chaser using a small telescope or long lens are the Losmandy Starlapse and the Astrotrac.
The Losmandy Starlapse doesn't require counterweights which you'd otherwise have to lug... at some expense... onto planes/trains/automobiles.
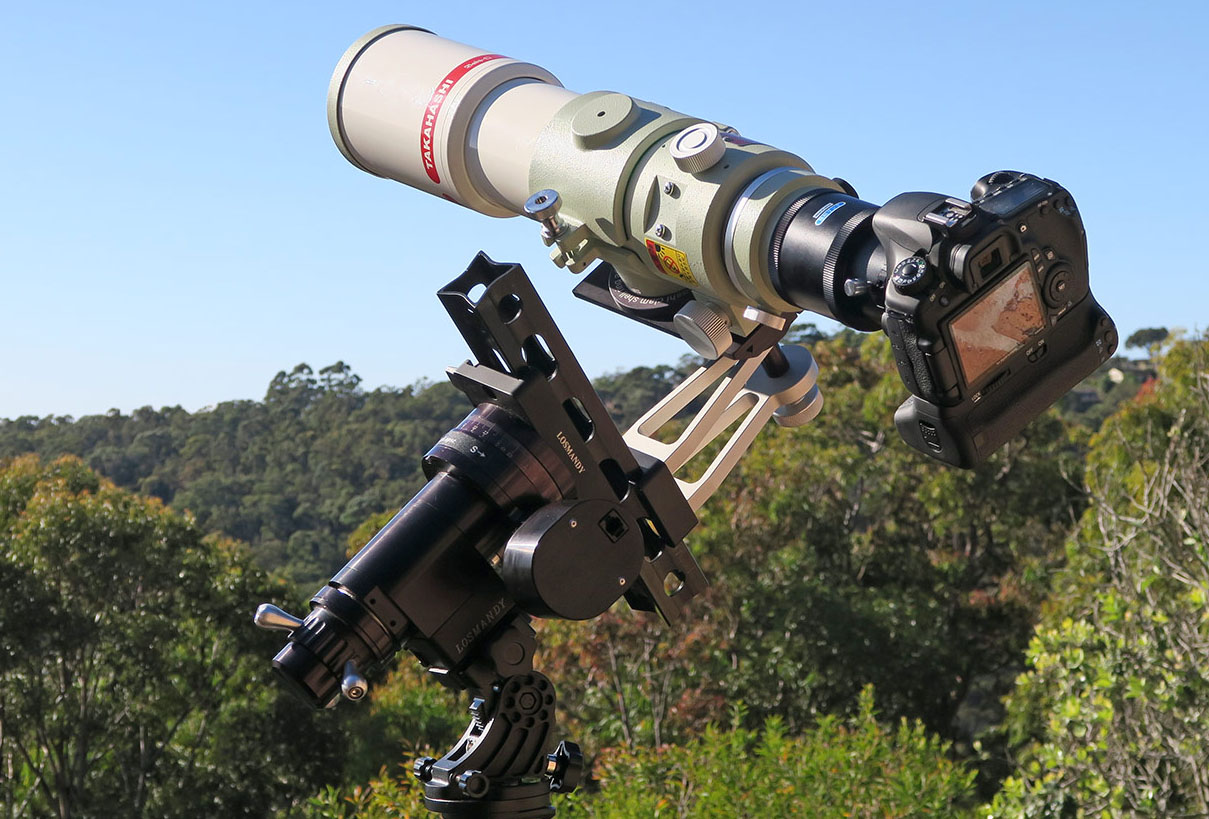
Above: The sadly discontinued Losmandy Starlapse...the perfect travel rig for small telescopes.
Requires NO counterweights
Camera:
A DSLR is pretty much a pre-requisite. To make sure you don't run out of battery power look at also getting a battery grip. Shoot in RAW plus .jpg . A remote shutter cable will minimise any camera vibrations, and shooting stills from a live view mode will minimise any mirror slap.If you are using a camera lens, turn off any image stabilisation and use manual focus.
Unless you want to fry your camera's sensor (think about it.....you are effectively using a magnifying glass to focus the Sun on sensor! ) you'll need a solar filter to focus on the Sun prior to totality.
If your camera has one, use the 10x (or maximum size) magnifying tool to inspect the image and nail the focus.
FOCUS! FOCUS! FOCUS! Once you nail it, you can forget about it and just concentrate on shooting frames.
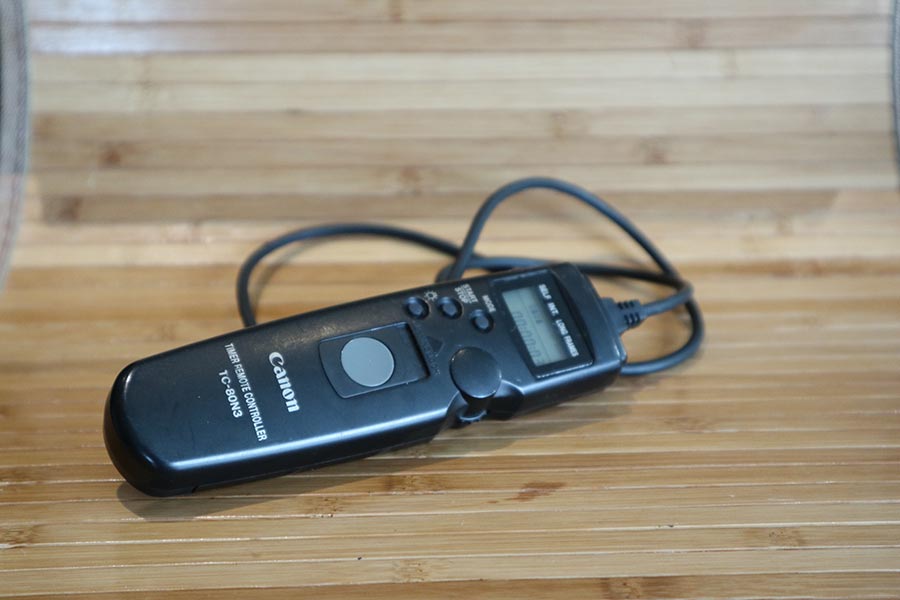
A cable release is also a must to avoid imparting any vibration to the camera as you release the shutter. Canon's TC80N3 does this plus gives you a whole suite of intervalometer functions.
There are also cheap "made in China" knock-offs, that do the same job, for a fraction of the price. That said, my Canon TC80 is about 10 years old now, and despite being cable-snagged and dropped countless times, still works perfectly. I'm not sure how reliable the electronics are in a knock-off that only costs $20-$30
Cool Stuff:
CamRanger and its i-pad/tablet App. This Wi-Fi based piece of white-man-magic works just soooo well.
Nice big images from the camera in real-time, fast and easy changes to pretty much everything your camera can do...without touching the camera (well except for changing the shooting mode from say Program to Manual or Bulb).
GPS position, Compass and inclinometer Apps for your smart phone. Use the GPS to nail your latitude, the inclinometer to set the EQ head angle (= latutude) and compass to north in a matter of minutes.
Random stuff:
- Spare batteries for everything. (Murphy's Law will otherwise apply)
- All required assembly tools...e.g. Hex keys or 10 cent coin to tighten a quaint photo-tripod bolt.
- Lens cleaning tissue, cleaning liquid (less than 100ml...due airlline security) and air blaster.
- Swiss Army knife and or small screwdrivers.
- Electricians/duct tape
- Spare memory cards.
Assemble and test the entire rig before you finally pack it.
Sunscreen SPF50 or so.
Foreign plug adapters...and make sure your chargers will work on both 110Vac and 240Vac.
Make sure all batteries are charged and in your camera the night before the eclipse. Fully charged batteries aren't much use still sitting in their chargers in the hotel room.
Using a mylar filter? Then pack some spare Mylar and super glue...as it can be perforated very easily.
Eclipse day:
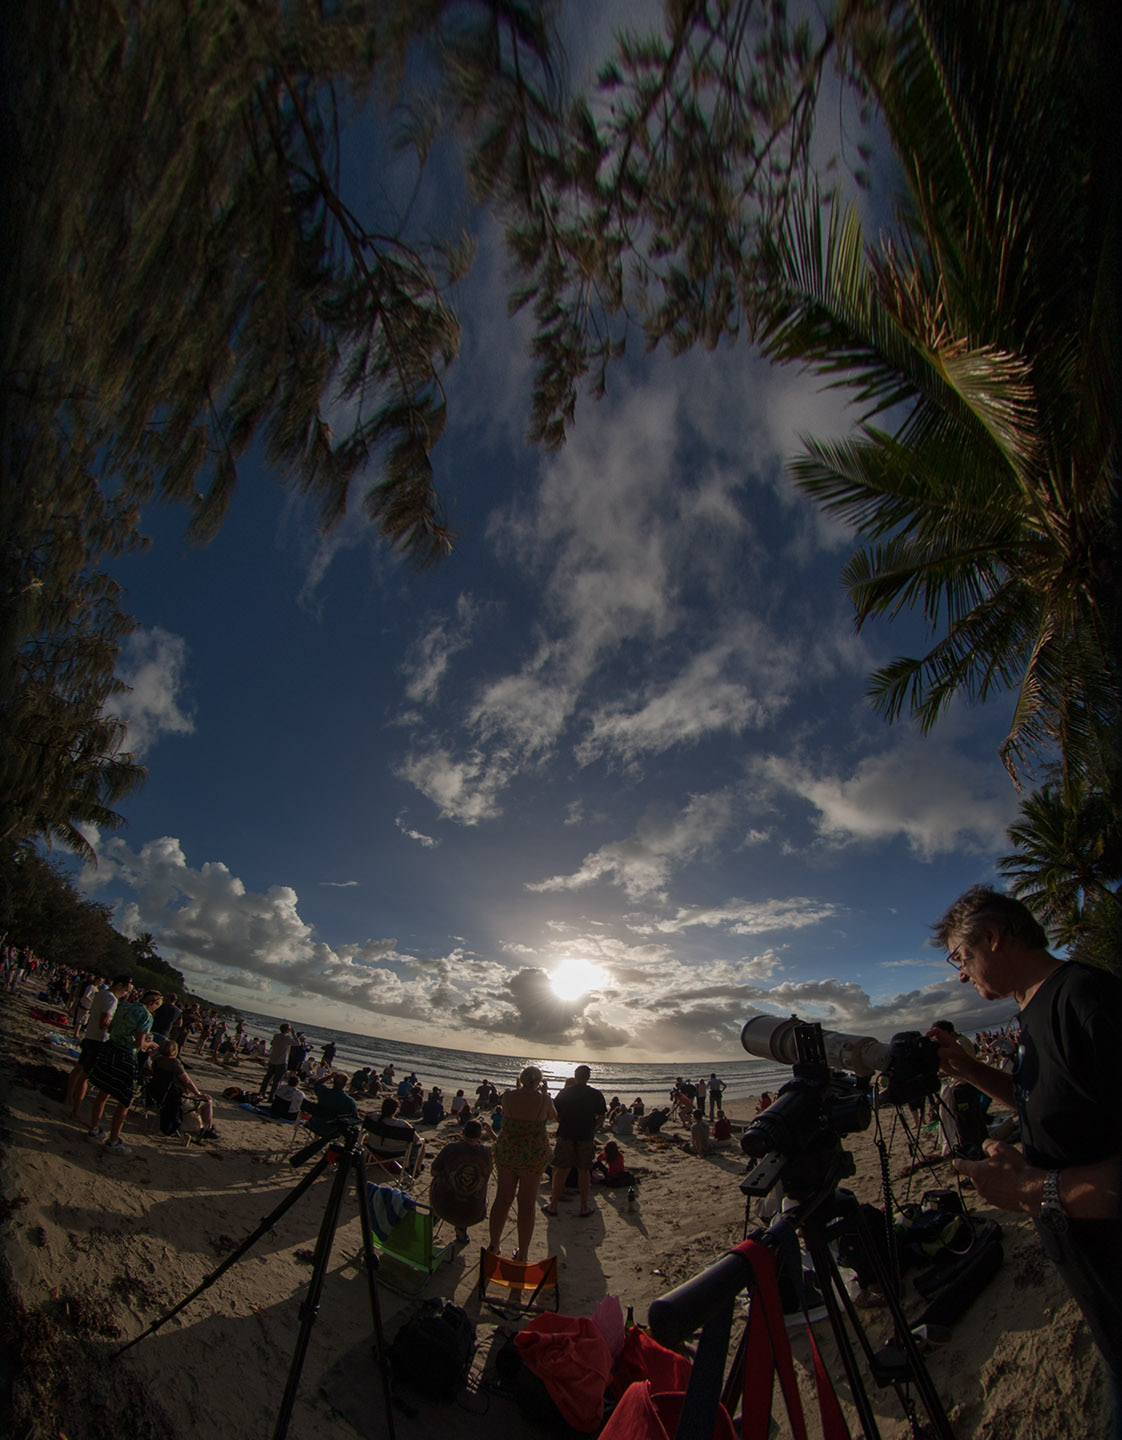
Liberally apply sunscreen to your face, nose and the top of your ears. Get to where you need to be early. Trust me, if there is a threat of clouds you'll be looking up a lot, and will be thankful for having applied that sunscreen by the end of the day.
Put your solar filter in place.
Turn Auto-focus off.
Set Daylight white-balance
FOCUS ACCURATELY, then forget about it. Use a prime rather than zoom lens as they usually have better contrast, colour correction and less ghosting.
About 10 minutes before totality, gently remove the solar filter (i.e. try not to ruin the focus)
Exposure times :
One size will not fit all !!
Don't simply blaze away in A or P modes. You'll need to be in manual mode.
2-3 seconds at ISO 200 will get you the outer corona, but burn-out the inner corona. 1/1000th of a second show the inner corona, but not much else....but it will be great for Bailey's Beads and the diamond ring at the start and end of the eclipse.Pre-set the camera to high speed shooting mode....more frames rather than less is never a problem.
Leaving the f-stop constant, methodically double (eg: 1/500th, 1/250th, 1/125th 1/64th etc. ) each exposure time during totality, then reverse the process as the eclipse comes to an end.
Work quickly but smoothly. Rehearsing prior to the event helps, as the eclipse itself will be over before you know it.
Also don't forget to have a look at the eclipse other than through a viewfinder.The view through warm human eyes is something you will cherish forever.
Clear Skies!